
Sauces & Condiments
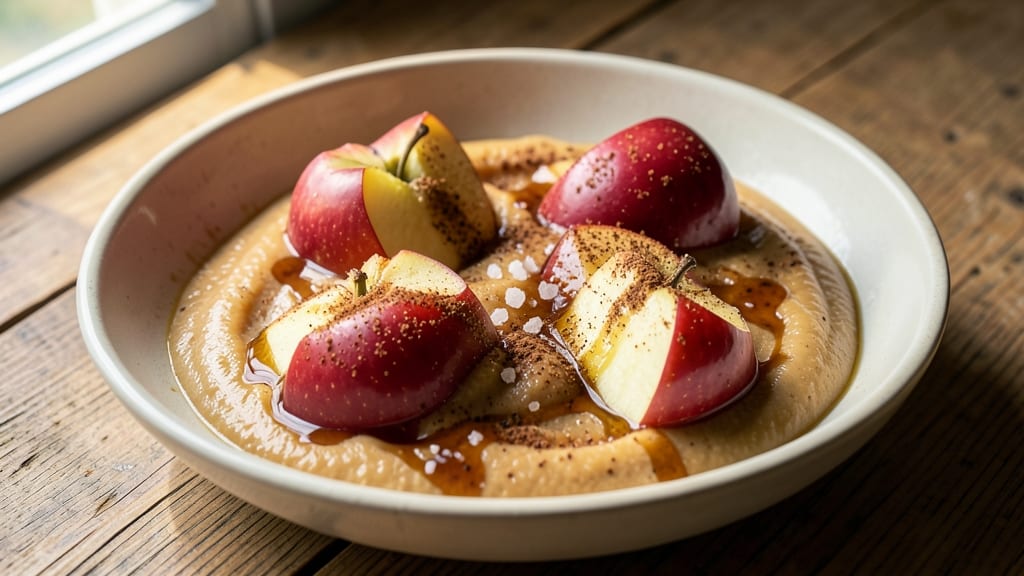
This applesauce recipe without peeling apples delivers restaurant-quality texture and flavor with minimal effort. The secret lies in leaving the skins on—simmering whole apples until they break down naturally into a smooth, velvety sauce with subtle earthy depth.
I developed this method after years of peeling apples only to find the sauce still tasted underwhelming; the skins actually add complexity that store-bought versions lack.
What makes this recipe stand out is the one-pot simplicity—no peeling, no chopping, just core the apples and simmer until tender. A touch of cinnamon and brown sugar enhances the natural sweetness while keeping the process foolproof for beginners.
The skins soften completely, blending seamlessly into the sauce without bitterness or grit.
By the end, you'll have a golden, aromatic applesauce with a perfect balance of sweetness and spice—ideal for topping pancakes, pairing with pork, or enjoying spoonful by spoonful. The texture is velvety yet retains just enough body to cling to a spoon.
Best of all, this method preserves more nutrients than peeled versions while saving you time.
For extra depth, try adding a pinch of nutmeg or cardamom during the final minutes of cooking. The sauce keeps well in the refrigerator for up to a week, making it perfect for meal prep. Here's how to make it perfectly every time.
Ingredients for applesauce recipe without peeling apples
Eight ingredients transform whole apples into velvety, spiced applesauce without peeling or chopping.
| Ingredient | Amount | Notes |
|---|---|---|
| Apples (Honeycrisp or Granny Smith) 🍎 | 4 whole | Cored, unpeeled, roughly equal size |
| Brown Sugar 🍯 | ¼ cup | Light or dark, packed |
| Ground Cinnamon 🌿 | 1 ½ tsp | Freshly ground preferred |
| Apple Cider Vinegar 🍶 | 1 tbsp | For brightness and balance |
| Water 💧 | ½ cup | Or apple juice for deeper flavor |
| Pinch of Salt 🧂 | ⅛ tsp | Enhances all flavors |
| Ground Nutmeg 🌶️ | ¼ tsp | Optional, adds warmth |
| Cardamom Pods 🌿 | 2 whole | Crushed, for exotic depth |
The apples are everything—Honeycrisp or Granny Smith work best for their balance of sweetness and tartness. Local farmers markets often have the freshest varieties, but grocery store apples in the produce section (like Whole Foods or Trader Joe's) are perfectly fine. Skip the bruised ones—they’ll make your sauce bitter. For extra convenience, grab pre-cored apples (they’re in the produce section at Kroger or Safeway), but coring yourself ensures no hidden bugs or stems sneak in. The skins soften beautifully when simmered whole, adding that earthy depth that store-bought versions miss. Pro tip: If your apples are particularly large, quarter them lengthwise to speed up cooking—just don’t peel!
No brown sugar? White sugar or maple syrup works, but brown adds that caramelized richness. Cinnamon is non-negotiable—it’s the soul of this sauce, but if you’re out, allspice or pumpkin pie spice can step in. The apple cider vinegar might seem odd, but it brightens the sauce and cuts through any bitterness from the skins. Short on water? Use apple juice or even white grape juice—it’ll deepen the flavor. And if you’re feeling fancy, a splash of bourbon (about 1 tbsp) during the last 5 minutes of cooking adds a smoky twist that pairs perfectly with pork or pancakes. Cardamom is optional but magical—if you skip it, double the nutmeg for warmth.
This sauce tastes even better the next day as the flavors meld. Store it in an airtight glass jar in the fridge for up to 1 week, or freeze portions in ice cube trays for quick single-serving use. Reheating tip: Warm gently in a saucepan over low heat—microwaving can make it grainy. The skins break down completely, so you’ll never taste the peel. Meal prep hack: Double the batch and freeze half. Thaw overnight in the fridge, then reheat for homemade applesauce cereal or spiced yogurt parfaits. Trust me, your pantry will thank you.
Why You'll Love This Recipe
- I’ll be real: skipping the peel means I save 15 minutes and no sticky fingers. Just core, chop, and toss those Honeycrisp apples into the pot—skin and all. The texture’s still silky, and honestly? The subtle bitterness from the peel just deepens that cozy cinnamon warmth.
- No Peel, All Win: I’ll be real: skipping the peel means I save 15 minutes and no sticky fingers. Just core, chop, and toss those Honeycrisp apples into the pot—skin and all. The texture’s still silky, and honestly? The subtle bitterness from the peel just deepens that cozy cinnamon warmth.
- Sweet-Tart Magic: That splash of apple cider vinegar and Granny Smith’s sharp bite cut through the brown sugar’s richness like a knife. It’s the kind of balance that makes you reach for seconds—even when you’re pretending to diet. (Between us, the kids don’t notice my sneaky swaps.)
- Weeknight Sidekick: This isn’t just dessert or breakfast—it’s my go-to for oatmeal, pancake toppings, or even a quick chutney for pork chops. Make a big batch on Sunday, and suddenly you’ve got a pantry staple that works for everything. (Yes, even on a Tuesday night.)
Step-by-step instructions for skin-on spiced applesauce
Here's how to transform whole, unpeeled apples into velvety, fragrant applesauce with minimal effort.
Core and Quarter the Apples
Start by washing the 4 whole apples thoroughly under cool water. Using a sharp paring knife, carefully core each apple from the top down, removing the blossom end first to create a stable base. I like to make a small incision around the stem, then twist gently to pop out the core—this prevents the fruit from splitting.
Cut each apple into 6-8 wedge-shaped pieces, leaving the skin intact. The skin adds natural sweetness and fiber, so don't peel. For even cooking, try to make the wedges roughly equal in size. Place them in a large, heavy-bottomed pot—this helps distribute heat evenly and prevents scorching at the bottom.
Add Liquids and Sweetener
Pour in the 0.5 cup water (or apple juice for deeper flavor) and the 1 tbsp apple cider vinegar. The vinegar brightens the applesauce and balances the natural sweetness. Add the 0.25 cup brown sugar, stirring gently to dissolve it. I prefer light brown sugar here—it adds just enough caramel notes without overpowering the apple flavor.
Bring the mixture to a gentle boil over medium-high heat. You'll see bubbles form around the edges of the pot first. Once it reaches a rolling boil, reduce the heat to medium-low. The goal is to maintain a steady simmer where small bubbles break the surface occasionally—this prevents the apples from burning while ensuring they cook through.
Simmer Until Tender
Cover the pot with a lid and let the apples simmer for 20-25 minutes. The exact time depends on your apples—Honeycrisp will cook faster than Granny Smith. You'll know they're ready when a fork slides in easily and the wedges are soft but still hold their shape slightly.
I like to check after 20 minutes by testing one piece. If it feels tender but still offers a little resistance, give it another 5 minutes. Resist the urge to peek under the lid—every time you lift it, steam escapes and increases cooking time. If the mixture looks too dry, add 1-2 tablespoons of water and continue simmering.
Season and Finish
Once the apples are tender, remove the pot from heat. Using a wooden spoon, gently mash about half of the apples against the sides of the pot to break them down. Leave the other half slightly chunky for texture. Add the 1.5 tsp ground cinnamon, 0.125 tsp pinch of salt, 0.25 tsp ground nutmeg, and the 2 whole cardamom pods (lightly crushed between your palms).
Return the pot to low heat and let it simmer uncovered for another 5-7 minutes. This allows the spices to infuse fully and the flavors to meld. The applesauce should thicken slightly as it sits. For a smoother texture, use an immersion blender to puree it partially—just until you reach your desired consistency. Taste and adjust sweetness if needed, adding more brown sugar if desired.
Cool and Serve
Transfer the applesauce to a clean bowl or jar, discarding the cardamom pods. Let it cool to room temperature, then refrigerate for at least 1 hour before serving. The flavors deepen as it chills, and the texture becomes even more velvety. Serve warm with roasted meats, over oatmeal, or as a topping for pancakes.
This applesauce keeps well in the refrigerator for up to 5 days. For longer storage, transfer to an airtight container and freeze for up to 3 months. The skin-on method preserves more nutrients and creates a richer, more complex flavor than peeled applesauce—trust the process and enjoy the difference!
Pro Tips For Making Applesauce Recipe Without Peeling Apples
- CHOP UNEVENLY: Cut apples into big, irregular chunks—no need for perfect dice. The skin’s texture holds up better when the pieces vary in size, and you’ll avoid a mushy end result that happens when everything breaks down at once.
- SIMMER LOW AND LONG: After the initial boil, drop the heat to a bare simmer and let it cook uncovered for at least 20 minutes. Rushing this step leaves starch behind, making the sauce cloyingly thick instead of naturally rich—like the difference between a puddle and a proper sauce.
- SALT THE WATER: Add a pinch of salt to the water when you start cooking. It’s not about flavor (the apples and spices will dominate), but it helps break down the pectin in the skins faster, cutting the total cook time by 5-10 minutes without sacrificing texture.
- VINEGAR LAST: Stir in the apple cider vinegar only in the final 5 minutes of cooking. Dumping it early can make the skins bitter, and you’ll end up with a tangy aftertaste instead of the bright, balanced finish that makes this recipe shine. (Yes, even if you’re impatient like me.)
Make-ahead tips for this dish
Batch Prep Strategy
Double the recipe and freeze half for future use—I make two batches whenever I have time. Store the extra in quart-sized freezer bags, squeezing out excess air to prevent freezer burn.
Label with the date so you can track freshness. This way, you always have homemade applesauce ready for weeknight dinners or holiday breakfasts. 🧊
Freezer Storage Tips
For long-term storage, pour the cooled applesauce into ice cube trays and freeze. Once solid, transfer the cubes to a ziplock bag—this makes single-serving portions perfect for smoothies, oatmeal, or yogurt.
When reheating, thaw overnight in the fridge or microwave on low power for 1-2 minutes, stirring halfway. Never microwave frozen applesauce directly—it’ll turn grainy. 💫
Fridge Longevity
This applesauce tastes even better after 24 hours as flavors meld. Store in an airtight glass jar in the fridge for up to 5 days. The skins soften completely, so you’ll never detect any peel texture.
If it thickens too much, stir in 1-2 tablespoons of water before reheating. For extra freshness, place a damp paper towel over the surface before sealing the lid—this prevents a skin from forming. ✨
Meal Prep Hacks
Use this applesauce as a base for spiced yogurt parfaits—layer with Greek yogurt and granola for a protein-packed breakfast. Or blend into homemade applesauce cereal by mixing with oats and honey.
For a quick lunch, spread on toasted sourdough with a sprinkle of pecans and a drizzle of honey. The possibilities are endless, and it saves time during busy weeks. 💡
Spice Variations
Make ahead different flavor versions by dividing the sauce into small jars before adding spices. One batch with cinnamon and nutmeg, another with ginger and cloves, and a third with vanilla and bourbon.
Label them clearly so you can grab the perfect flavor for any dish. The spices infuse better when stored for 24 hours, so prep these variations a day ahead. 🌶️
Reheating Perfection
For smooth reheating, transfer applesauce to a small saucepan and warm over low heat with 1-2 tablespoons of water to prevent scorching. Stir occasionally until heated through—10-15 minutes is ideal.
If using the microwave, cover with a damp paper towel and heat in 30-second intervals, stirring between each. This method keeps the texture creamy and lump-free. 🔥
Nutrition facts
Frequently asked questions
Why does leaving the skins on improve flavor?
The skins contain natural pectin and subtle earthy notes that enhance sweetness and depth. When simmered properly, they soften completely without bitterness, adding complexity that peeled versions miss. Think of it like tea leaves—more surface area means richer flavor!
Can I use any apple variety for this recipe?
Honeycrisp or Granny Smith work best, but avoid overly tart varieties like Braeburn—they can make the sauce too sharp. If using mixed apples, balance one tart with one sweet. For example, pair Fuji with Gala. The skins should soften completely, so choose firm apples that hold their shape during cooking.
How do I fix applesauce that's too thick or too thin?
For thick sauce, stir in 1-2 tablespoons of water and simmer 2-3 minutes longer. Too thin? Return to heat uncovered for 5-7 minutes to reduce. For ultra-smooth texture, blend with an immersion blender after cooking. The skins break down completely, so you'll never detect any peel texture.
Is this applesauce safe for babies?
Yes, but wait until your baby is 6+ months and can sit upright. The skins soften completely and are safe when fully cooked. For first foods, skip added sugar and use only apples and cinnamon. Always test a small amount first to check for allergies. The natural sweetness makes it perfect for weaning.
Can I make this in a slow cooker?
Core and quarter 4 apples, add all ingredients, and cook on LOW for 4-5 hours or HIGH for 2-3 hours. The slow cooker's gentle heat preserves texture better than stovetop. For extra flavor, add a splash of apple cider during the last 30 minutes. Just mash slightly before serving—it'll be even smoother!