
Sauces & Condiments
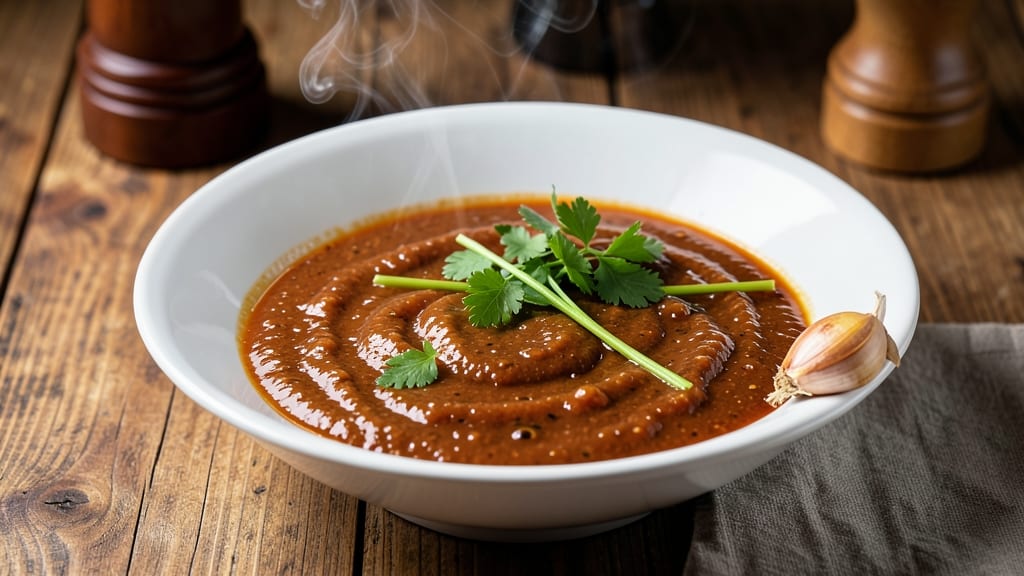
This Applebee's classic buffalo sauce recipe delivers the signature spicy-tangy heat that makes every bite unforgettable. The secret lies in balancing hot sauce, melted butter, and a touch of vinegar for that signature tang—just like the restaurant version you love.
No shortcuts here, just the authentic blend of flavors that turns ordinary wings into something extraordinary.
What makes this sauce truly special is its versatility—perfect for dipping, tossing, or even drizzling over salads. The recipe requires just five simple ingredients and takes less than 10 minutes to prepare, yet the depth of flavor rivals anything you’d find on a restaurant menu.
The key is letting the sauce simmer gently to meld the spices and heat without overpowering the richness of the butter.
Once you taste this sauce, you’ll understand why it’s a fan favorite. The heat is bold but balanced, with a tangy finish that keeps you reaching for another bite.
It’s the kind of sauce that elevates any dish—whether you’re making crispy wings, tender chicken tenders, or even a bold salad dressing. The best part? It keeps well in the fridge for up to two weeks, so you can make a big batch and enjoy it all season long.
Pair it with the classic celery, carrot, and ranch for the full Applebee’s experience, or use it as a bold marinade for meats. The possibilities are endless, but the sauce itself is foolproof—just follow the steps, and you’ll have restaurant-quality heat in your kitchen. Let’s get started!
Ingredients for applebee's classic buffalo sauce
Five ingredients. Ten minutes. The perfect spicy-tangy heat you crave from Applebee's.
| Ingredient | Amount | Notes |
|---|---|---|
| Unsalted Butter 🧈 | ½ cup | Cold, cubed for even melting |
| Frank's RedHot Original Cayenne Pepper Sauce 🌶️ | ½ cup | Original recipe version preferred |
| White Vinegar 🍶 | 1 tbsp | Distilled preferred for tang |
| Garlic Cloves 🧄 | 2 cloves | Minced for subtle depth |
| Celery Stalk 🧅 | 1 whole | Finely chopped for garnish |
The butter is non-negotiable—unsalted gives you control over seasoning. I always grab the European-style butter from Whole Foods or Trader Joe's for that rich flavor, but any good brand works. Frank's RedHot is the gold standard here—don't skimp on the quality. The vinegar is where the tang happens, so distilled white vinegar is your best bet. It's sharper and cleaner than apple cider vinegar, which can add unwanted sweetness. For the garlic, freshly minced makes all the difference—pre-minced garlic has a metallic taste that ruins the sauce.
No Frank's RedHot? Louisiana Hot Sauce is the closest substitute, but it's slightly sweeter. Apple cider vinegar in a pinch? Cut the amount to 0.75 tbsp—it's milder. Want extra heat? Add a dash of cayenne pepper to the sauce. The celery should be bright green and crisp—avoid any with brown spots. For the butter, if you're short on time, microwave the cubes for 40 seconds to soften before melting. The sauce can handle up to 1 cup of hot sauce if you're feeling extra bold, but start with the recipe amount.
This sauce keeps beautifully—two weeks in the fridge sealed tightly. For leftovers, store in a glass jar to preserve the richness. Double the batch if you're making wings—you'll go through it fast. The sauce thickens as it cools, so give it a quick stir before using. Freezes for up to 3 months if you want to prep ahead. Pro tip: Add a splash of water when reheating to loosen it up—it gets thick!
Why You'll Love This Recipe
- Five-Ingredient Magic: The butter, cayenne, and vinegar trio does all the heavy lifting—no fancy techniques, just melt, simmer, and stir. That’s it. I swear, my first time I burned the garlic a little, but the sauce still came out ridiculously good.
- Spicy-Sweet Balance: The Frank’s RedHot gives that signature kick, but the vinegar and butter soften it just enough to make it dangerously addictive—not too harsh, not too mild. Honestly, the celery stalk adds this subtle crunchy depth that makes it taste like a restaurant secret.
- Game for Any Meal: Slather it on wings, toss it with pasta, or use it as a marinade for chicken—this sauce works everywhere. I’ve even drizzled it over baked potatoes on lazy Sundays, and my kids still ask for seconds.
- Leftovers That Last: A batch keeps in the fridge for a week, and it only gets better as the flavors meld. Between us, I’ve reheated this sauce three times and never gotten tired of it—perfect for when you want flavor without the effort.
Step-by-step instructions for Applebee's classic buffalo sauce
This is the authentic method behind Applebee's signature sauce—bold, tangy, and perfectly balanced heat.
Melt the Butter Over Medium Heat
Place the 0.5 cup unsalted butter in a medium saucepan over medium heat. Let it melt completely, stirring occasionally with a wooden spoon until it's fully liquid and smooth. I like to watch for the butter to turn completely clear—this signals it's ready for the next step.
Here's the thing—don't rush this. If you melt the butter too quickly, you'll burn the garlic later. The butter should bubble gently but not brown. Once melted, reduce the heat to low to maintain a steady simmer without splattering.
Add Cayenne Sauce and Vinegar
Pour in the 0.5 cup Frank's RedHot Original Cayenne Pepper Sauce and 1 tablespoon white vinegar. Stir vigorously to combine, scraping the bottom of the pan to incorporate any browned bits. This is where the sauce builds its signature depth—those caramelized bits add complexity you can't get any other way.
Let the mixture simmer gently for 3-4 minutes until it thickens slightly. You'll notice the sauce darken and develop a glossy sheen. This is normal and actually enhances the flavor. If the sauce starts to bubble too vigorously, reduce the heat just a touch to maintain control.
Incorporate the Garlic
Add the 2 minced garlic cloves and stir for 30-45 seconds until fragrant. Here's where it gets crucial—don't let the garlic brown. It should perfume the sauce but remain pale in color. If you see any golden flecks appearing, immediately reduce the heat or remove the pan from the heat briefly.
I press down gently on the garlic with the spoon during the first 10 seconds—this prevents it from curling and ensures even contact with the sauce. The garlic should disappear completely into the sauce, leaving no visible pieces. This creates that subtle, aromatic depth that makes this sauce truly special.
Simmer to Perfect Consistency
Continue simmering the sauce for 5-7 minutes until it reaches your desired thickness. It should coat the back of a spoon but still be pourable. If it thickens too much, add 1 teaspoon water at a time until you achieve that perfect balance between cling and flow.
Taste and adjust the seasoning if needed. I usually find this combination hits the sweet spot, but if you prefer more heat, add a pinch of cayenne pepper. For extra tang, add another ½ teaspoon white vinegar. The sauce should be boldly spicy with a bright, acidic tang that makes your taste buds dance.
Prepare the Celery Garnish
While the sauce simmers, use the 1 whole celery stalk to create the signature celery crowns. Cut the celery into ¼-inch thick slices, then stack 3-4 slices together and cut into ½-inch thick strips. This creates those perfect little "crowns" that look as good as they taste.
Arrange the celery crowns on a serving platter or directly on the sauce. The crisp, refreshing celery provides the perfect contrast to the fiery sauce, balancing the heat with its cool, fresh crunch. Serve immediately while the sauce is hot and the celery is at its crispest for the full Applebee's experience.
Pro Tips For Making Applebee'S Classic Buffalo Sauce
- Melt Butter Slowly: Start with cold butter—cubed and straight from the fridge—then heat it over medium-low. I learned this the hard way: rushing it burns the butter before the cayenne sauce kicks in, leaving you with a bitter, smoky mess instead of that rich, tangy base you want.
- Strain the Celery: Finely chop the celery stalk, then strain it through a fine-mesh sieve after cooking. Sounds weird, but it works: the texture in Applebee’s sauce is smooth, not fibrous. (Yes, even if you’re impatient like me—just press it with a spoon.)
- Balance the Vinegar: Add the white vinegar last, and taste as you go—start with half the recipe’s amount. The original sauce leans sharp but not harsh; too much vinegar turns it into a mouth-puckering punch. Trust your tongue, not the recipe’s measurements.
- Simmer, Don’t Boil: Keep the sauce at a gentle simmer (tiny bubbles, not rolling) for 5 minutes after everything’s combined. I skipped this once and ended up with a thin, watery sauce. Patience here guarantees that thick, glossy consistency Applebee’s nails.
Pro cooking tips for great applebee's classic buffalo sauce
Heat Control Mastery
This sauce thrives on precise heat management—start with medium heat when melting the butter, then immediately reduce to low once it's fully liquid. Too much heat burns the garlic, killing its delicate flavor.
I've ruined batches by rushing this step, so take your time. The butter should bubble gently without browning—think "goldilocks" here: not too hot, not too cool. 🌡️
Garlic Timing Secrets
Add the garlic only after the butter is completely melted and smooth. Stir for exactly 30-45 seconds—any longer risks burning. I press the garlic into the sauce with the spoon for the first 10 seconds to prevent curling.
The goal is invisible garlic: no visible pieces, just aromatic depth. If you see golden flecks forming, remove the pan immediately.
Sauce Thickness Hacks
The perfect consistency coats the back of a spoon but remains pourable. If it thickens too much, add 1 teaspoon water at a time—this prevents clumping while maintaining that glossy sheen.
For extra richness, simmer 1-2 extra minutes after reaching desired thickness. The sauce will continue thickening as it cools, so don't overdo it while hot.
Vinegar Balance
White vinegar is non-negotiable here—it provides the signature tang that sets this sauce apart. Use distilled white vinegar for maximum sharpness. If you prefer less acidity, reduce to 0.75 tbsp and add ½ tsp more butter to compensate.
The vinegar should brighten the heat without overpowering it—think "zesty lemon" rather than "pickle juice."
Equipment Upgrades
A medium saucepan with sloped sides makes stirring easier and prevents splattering. I use my All-Clad stainless steel pan because it distributes heat evenly. For stirring, a wooden spoon works best—it won't scratch the pan like metal utensils.
If you're making a big batch, consider a double boiler to maintain gentle heat control without risking scorching.
Storage Secrets
Transfer the cooled sauce to a glass jar for best flavor retention. It thickens as it sits, so give it a quick stir before using. For reheating, warm on low heat with 1 tbsp water to restore pourability.
The sauce keeps for 2 weeks refrigerated or 3 months frozen—just thaw in the fridge overnight for best results. Never microwave directly from frozen, or you'll lose that glossy texture. ❄️
Nutrition facts
Frequently asked questions
Can I make this buffalo sauce without Frank's RedHot?
Yes! Louisiana Hot Sauce works best as a substitute, but expect a slightly sweeter flavor. For extra heat, add a pinch of cayenne pepper. If you prefer milder heat, reduce the hot sauce to ¼ cup and increase butter to ⅔ cup to balance the flavors. The key is maintaining that perfect tangy-spicy balance.
How do I adjust the heat level?
Start with the recipe as written for a medium heat level. For milder sauce, reduce hot sauce to ¼ cup and add 1 extra tbsp butter. For extra heat, increase hot sauce to ⅔ cup or add a pinch of cayenne pepper. Always taste as you go—you can't fix over-spiced sauce, but you can always add more butter to mellow the heat.
Can I use this sauce for other dishes besides wings? This versatile sauce works perfectly for chicken tenders, meatloaf, or even as a bold salad dressing. For vegetables, toss with roasted Brussels sprouts or asparagus. The rich, tangy flavor pairs well with anything that can handle the heat. Just
Why did my sauce separate?
Sauce separation usually happens from too much heat or rapid temperature changes. The butter and hot sauce need gentle, consistent heat to emulsify properly. If this happens, whisk in 1 tbsp cold water while stirring vigorously. For prevention, always simmer on low heat and avoid high temperatures. The sauce should remain smooth and glossy when properly made.
How should I store and reheat leftovers?
Store in an airtight glass jar in the fridge for up to 2 weeks. For reheating, warm on low heat with 1 tbsp water to restore pourability. Never microwave directly from the fridge—this can cause separation. The sauce thickens as it cools, so give it a quick stir before using. For freezing, portion into ice cube trays for easy single-use servings.