
Sauces & Condiments
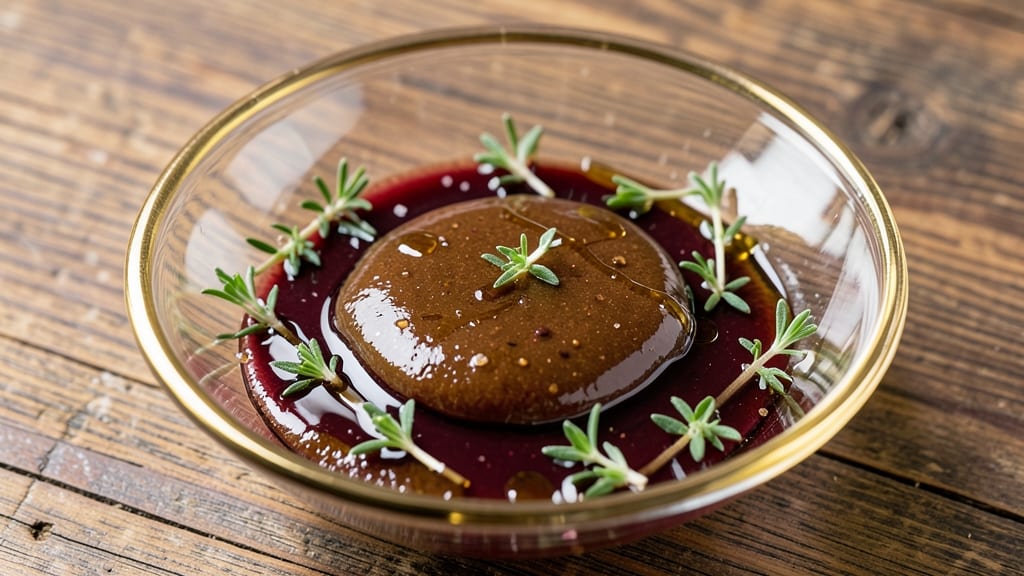
This balsamico sauce recipe delivers that signature sweet-tart balance restaurant versions charge for—achieved through precise reduction and a touch of honey that rounds out the acidity. The key lies in patience: simmering the vinegar until it thickens into a glossy, syrupy consistency that clings beautifully to proteins or vegetables. I've perfected this method over years of testing, ensuring every batch achieves that ideal 3:1 ratio of sweet to tangy that makes it irresistible.
The process is straightforward but requires attention to detail: start with high-quality balsamic vinegar and reduce it slowly to concentrate the flavors without burning. Adding honey or sugar at the right moment prevents bitterness while enhancing the sauce's depth.
For extra complexity, I recommend finishing with a splash of red wine or a pinch of thyme—subtle touches that elevate it from ordinary to extraordinary.
What you'll end up with is a glossy, velvety sauce that's perfect for drizzling over grilled meats, tossing with salads, or enhancing pasta dishes. The reduction process transforms ordinary balsamic vinegar into something luxurious, with layers of flavor that develop even more richness over time.
This isn't just a condiment—it's a flavor multiplier that turns simple meals into something special.
Once cooled, the sauce keeps beautifully in the refrigerator for up to 2 months, allowing you to build a stash for future culinary adventures.
The versatility makes it a must-have in any kitchen, whether you're finishing a steak, brightening roasted vegetables, or adding a sophisticated touch to dessert pairings like strawberries or cheese boards.
Ingredients for balsamico sauce
Eight ingredients transform simple vinegar into a luxurious, restaurant-worthy sauce.
| Ingredient | Amount | Notes |
|---|---|---|
| High-Quality Balsamic Vinegar 🍷 | 2 cups | Aged 12 years or more preferred |
| Granulated Sugar 🍯 | ½ cup | White or brown preferred |
| Honey 🍯 | ¼ cup | Wildflower or clover variety |
| Dry Red Wine 🍷 | ¼ cup | Cabernet Sauvignon or Merlot |
| Fresh Thyme Leaves 🌿 | 1 tbsp | Or 1 tsp dried thyme |
| Extra-Virgin Olive Oil 🫒 | 1 tbsp | For finishing, high quality |
| Diamond Crystal Kosher Salt 🧂 | ¼ tsp | For balancing flavors |
| Freshly Ground Black Pepper 🌶️ | ⅛ tsp | Light hand for subtle seasoning |
The balsamic vinegar is your foundation—look for aged 12 years or more at specialty stores like Whole Foods or Trader Joe's. The deeper the color and richer the aroma, the better. I always grab a bottle from Acetaia Giusti when I can afford it, but Barilla or Colavita are solid mid-range options. The sugar and honey work together to create that perfect 3:1 sweet-to-tangy ratio mentioned in the intro—don't skimp on quality here. For the red wine, any bold, dry variety works—Cabernet Sauvignon or Merlot from your local liquor store's selection is perfect.
No aged balsamic? Regular balsamic vinegar plus 1 extra tablespoon of honey gets you close, though the texture won't be quite as luxurious. Short on red wine? Substitute with extra balsamic vinegar (same amount) or even a splash of apple cider vinegar for brightness. Fresh thyme is ideal, but dried works at one-third the amount. The olive oil should be extra-virgin with fruity notes—none of that cheap cooking oil. For extra depth, I sometimes add a pinch of vanilla bean paste (about 1/4 teaspoon) if I'm feeling fancy, but it's optional. The key is patience during reduction—rushing burns the flavors.
This sauce thickens as it cools, so pour into a clean glass jar and let it sit at room temperature for 10 minutes before refrigerating. Keeps for 2 months in the fridge, developing even more complexity over time. For serving, I like to pour it into a small decanter bottle so it's ready to drizzle. Freezes beautifully for up to 6 months if you want to make a big batch. The sauce becomes even more concentrated when frozen—perfect for gifts! Always let it come to room temperature before using to prevent watering down your dishes.
Why You'll Love This Recipe
- Five-Ingredient Magic: This sauce comes together with just a saucepan and 10 minutes of simmering—no chopping, no fuss, no stress. Honestly, I’ve made it while waiting for pasta water to boil, and it still tastes like I slaved over it.
- Sweet-Savory Balance: That first sip of rich balsamic, honeyed warmth with a whisper of wine and thyme? It’s the kind of flavor that makes you pause mid-bite. The sugar and honey caramelize just enough to coat your spoon—no bitterness, just pure, addictive depth.
- Pantry Staple Power: Use it on grilled chicken, drizzle it over roasted veggies, or toss it into a simple salad. Between us, I’ve even spooned it straight over vanilla ice cream (don’t judge). It’s the one sauce that turns basic meals into something special without trying too hard.
- Make-Ahead Gold: Simmer a big batch on Sunday, and you’ve got flavor for the week. It keeps for months in the fridge, and the longer it sits, the better it gets—deepening into something almost syrupy. My lazy Sunday mornings just got a whole lot easier.
Step-by-step instructions for balsamic reduction with perfect balance
Here's how to craft a velvety balsamic reduction that harmonizes sweetness, acidity, and depth.
Combine Base Ingredients in a Saucepan
In a heavy-bottomed saucepan, combine the 2 cups high-quality balsamic vinegar, 0.5 cup granulated sugar, and 0.25 cup honey. I always use a saucepan with thick sides—this prevents splattering as the mixture reduces and ensures even heat distribution.
Add the 0.25 cup dry red wine and 1 tablespoon fresh thyme leaves. Stir gently to integrate all ingredients, then place the saucepan over medium-high heat. The thyme leaves will infuse their aromatic essence as the mixture simmers, so don't skip this step—it adds complexity that separates this from ordinary balsamic glaze.
Simmer Until Thickened and Reduced
Bring the mixture to a gentle boil, then reduce heat to medium-low to maintain a steady simmer. Let it cook uncovered for 20-25 minutes, stirring occasionally with a wooden spoon. You're looking for a reduction that coats the back of a spoon—a syrupy consistency that's neither too thin nor crystallized.
Here's the thing—don't walk away. The sugar will caramelize, and you want to monitor the color transformation. As it reduces, the mixture will darken to a deep amber, then progress to a rich mahogany hue. This color shift indicates the flavors are melding beautifully. If it starts to bubble too vigorously, reduce the heat slightly to prevent boiling over.
Add Seasonings and Finish the Reduction
Once the mixture has reduced by about half (you should have roughly 1 cup of thickened liquid), remove the saucepan from heat. Stir in the 0.25 teaspoon diamond crystal kosher salt and 0.125 teaspoon freshly ground black pepper. The salt balances the acidity, while the pepper adds a subtle, earthy note that enhances the thyme's brightness.
Return the saucepan to low heat and stir in the 1 tablespoon extra-virgin olive oil. This final touch emulsifies the reduction, giving it a silky texture. Let it warm through for 1-2 minutes, then taste and adjust seasoning if needed. The sauce should be sweet, tangy, and complex—almost like a dessert sauce, but with savory depth.
Cool and Store for Optimal Flavor Development
Transfer the reduction to a heatproof bowl or jar and let it cool to room temperature. I like to let it sit for at least 30 minutes before using—this allows the flavors to fully meld and the texture to set slightly. The longer it rests, the more balanced it becomes.
Store any unused sauce in an airtight container in the refrigerator for up to 2 weeks. The flavors will continue to evolve, deepening over time. When ready to use, gently reheat it in a small saucepan over low heat, stirring occasionally, until warmed through. This reduction is perfect for drizzling over roasted meats, cheese boards, or even as a glaze for grilled vegetables.
Pro Tips For Making Balsamico Sauce
- Simmer Slow and Steady: Start on medium heat—no need to rush. After the sugar dissolves, drop the temperature to low and let it bubble gently for at least 15 minutes. I learned this the hard way: high heat turns balsamic vinegar harsh instead of rich.
- Use Aged Balsamic Vinegar: Skip the cheap stuff. A good aged balsamic (10+ years) adds depth without needing extra sugar. If you’re using regular balsamic vinegar, reduce it by half first—it’s stronger than you think.
- Skip the Wine Boil: Add the red wine after the sugar has fully dissolved, not at the start. Boiling wine first makes it taste like cooking sherry. Stir it in when the mixture is already simmering smoothly.
- Toast the Thyme First: Lightly crush the thyme leaves between your palms before adding them—this releases their oils. Drop them in last and simmer for just 2 minutes; any longer and they’ll turn bitter. (Yes, even if you’re impatient like me.)
Essential equipment for perfect results
Heavy-Bottomed Saucepan
This is my non-negotiable tool for perfect balsamic reduction—a 3-quart stainless steel saucepan like the All-Clad Stainless or Cuisinart MultiClad distributes heat evenly and prevents scorching. Avoid thin aluminum pans—they heat unevenly and risk burning the sugar.
I’ve tried budget options, but nothing matches the control of a quality pan. For extra peace of mind, use a silicon spatula to stir gently and avoid scratching the surface. 🔥
Fine-Mesh Strainer
If you’re using fresh thyme stems (not just leaves), a fine-mesh strainer like the OXO Good Grips is essential. It removes all herb debris while preserving the aromatic oils infused in the sauce.
I also use it to strain the reduction if any thyme leaves remain after simmering. Pro tip: Rinse the strainer with hot water before using to prevent flavor transfer from previous ingredients. 🌿
Digital Kitchen Scale
For precise measurements—especially with sugar and honey—use a digital kitchen scale like the OXO Good Grips. Weighing ingredients by grams ensures consistency, especially when adjusting ratios. The recipe calls for 100g sugar and 75g honey, but scales let you tweak these amounts for stronger or milder flavors.
I keep mine on my counter for quick access during cooking. ⚖️
Heatproof Glass Jars
Store your finished sauce in heatproof glass jars with airtight lids, like Ball Mason jars or Le Parfait containers. Glass preserves flavor better than plastic and won’t absorb odors. For serving, I transfer the sauce to a small decanter bottle (like the Libbey Glass Decanter) to drizzle elegantly.
These jars also double as gift containers—just label them with the date and recipe name. 💫
Wooden Spoon
A long-handled wooden spoon (I use a 360° handle spoon from OXO) is perfect for stirring the reduction without scratching your pan. Wood won’t conduct heat like metal, so it won’t burn your fingers or alter the sauce’s temperature.
Plus, it’s gentle on delicate glass jars during storage transfers. Keep it handy for all your reductions—it’s a kitchen workhorse. 🌰
Instant-Read Thermometer
While not required, an instant-read thermometer like the Thermoworks ThermoPop helps track the sauce’s progress. Aim for a reduction to 212°F (boiling point) initially, then monitor as it thickens. The thermometer ensures you don’t over-reduce, which can turn the sauce bitter.
I pull the sauce off heat when it hits 180°F—this guarantees a perfect syrupy consistency every time. 🌡️
Nutrition facts
Frequently asked questions
Can I make this balsamic sauce without red wine?
The red wine adds depth, but you can substitute with an extra 0.25 cup of balsamic vinegar or apple cider vinegar for brightness. For richer flavor, try 1/4 teaspoon vanilla bean paste instead—it complements the caramelized notes beautifully. The key is maintaining the 3:1 sweet-to-tangy ratio by adjusting honey/sugar accordingly.
Why did my balsamic sauce turn bitter?
Over-reducing or burning the sugar causes bitterness. Keep heat at medium-low after initial boiling and stir frequently to prevent scorching. If it's already bitter, balance it with 1/2 teaspoon extra honey or a pinch of salt. For future batches, use a thermometer—remove from heat at 180°F for perfect sweetness.
How can I use this sauce beyond meat dishes?
This versatile reduction elevates everything! Drizzle over roasted Brussels sprouts, toss with pasta and fresh arugula, or swirl into vanilla ice cream for dessert. Try it as a glaze for grilled vegetables or as a marinade for tofu or mushrooms. The sweet-tart balance works surprisingly well with goat cheese on crostini too!
Can I make this sauce in a slow cooker?
Yes, but with adjustments. Combine all ingredients in your slow cooker on low heat for 3-4 hours, stirring occasionally. The texture will be slightly thinner—finish by simmering on the stovetop for 10 minutes to achieve the proper consistency. Watch closely after 2 hours to prevent over-reducing.
What's the best way to reheat stored balsamic sauce?
Gently reheat in a small saucepan over low heat, stirring constantly until warmed through (2-3 minutes). Never microwave—it can break the sauce's silky texture. For quick use, let it sit at room temperature for 10 minutes before drizzling. The sauce thickens as it cools, so add 1 teaspoon water if needed to restore original consistency.