
Sauces & Condiments
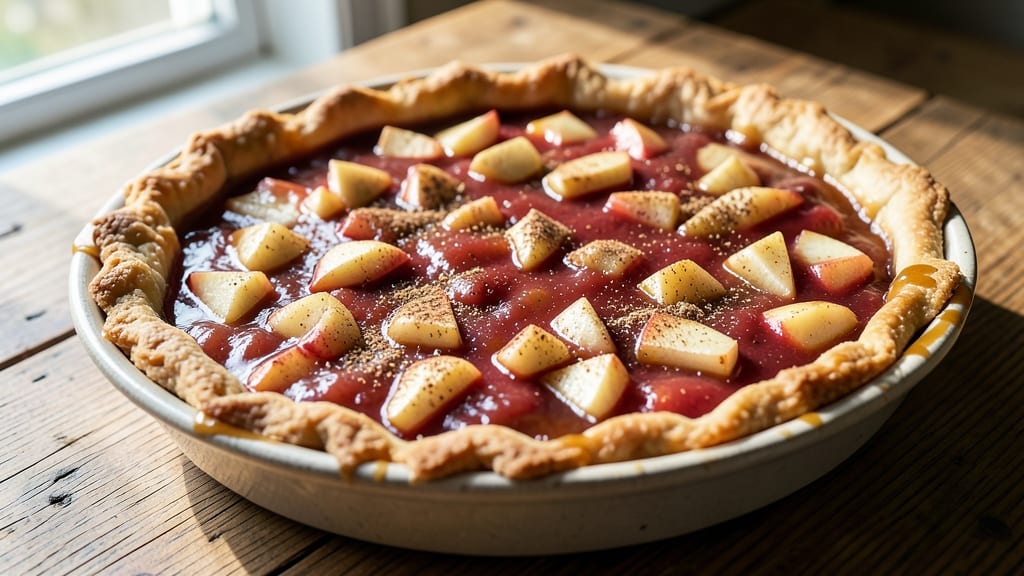
This apple sauce pie filling recipe transforms fresh apples into a velvety, spiced filling that pairs perfectly with buttery crusts. The secret lies in balancing sweetness with warm cinnamon and nutmeg, creating a texture that's thick enough to hold its shape yet tender enough to melt in every bite.
I developed this version after years of pie-making, where the right ratio of sugar and acidity makes all the difference.
What sets this filling apart is its foolproof technique—no added thickeners or cornstarch required. The apples break down naturally into a luscious, chunky sauce that's rich with flavor and just the right consistency for pies, tarts, or even as a topping for oatmeal.
The spices infuse deeply during the simmering process, ensuring every slice delivers that comforting autumnal taste.
By the time you're done, you'll have a restaurant-quality filling that's ready to be poured into your favorite crust. The filling stays fresh in the refrigerator for up to a week, making it perfect for meal prep or holiday baking.
Whether you're making a classic apple pie, mini tarts, or a rustic galette, this recipe delivers consistent, professional results every time.
For best results, use a mix of tart and sweet apples—like Granny Smith and Honeycrisp—for balanced flavor. The filling can also be frozen for up to 3 months, making it ideal for seasonal baking projects. Let's get started on creating this versatile, crowd-pleasing filling!
Ingredients for apple sauce pie filling
Spiced apples, sweet sugar, and a touch of citrus create this velvety filling that's perfect for pies, tarts, or oatmeal.
| Ingredient | Amount | Notes |
|---|---|---|
| Apples 🍎 | 4 medium | Tart and sweet mix preferred |
| Granulated Sugar 🍚 | 1 ¼ cups | Adjust based on apple sweetness |
| Lemon Juice 🍋 | ¼ cup | Freshly squeezed preferred |
| Ground Cinnamon 🌿 | 2 tsp | Freshly ground for best flavor |
| Ground Nutmeg 🌿 | ½ tsp | Freshly grated nutmeg preferred |
| Allspice 🌶️ | ¼ tsp | Or substitute with cinnamon |
| Salt 🧂 | ½ tsp | Kosher or sea salt preferred |
| Unsalted Butter 🧈 | ¼ cup | Cold, cubed for best texture |
| Vanilla Extract 🍯 | 1 tsp | Pure vanilla extract preferred |
| Water 💧 | ½ cup | Or apple cider for extra flavor |
Apples are the heart of this recipe, so pick a mix of tart and sweet varieties—Granny Smith and Honeycrisp work perfectly. Local farmers markets often have the best selection, but the grocery store produce section works too. Look for firm apples without bruises, as they'll hold up better during cooking. If you can't find Granny Smith, McIntosh or Braeburn are great substitutes. Peeling is optional, but I always peel mine for a smoother texture—just leave the cores in for extra flavor. The key is to use about 4 medium apples, which should yield roughly 4 cups of chopped fruit.
No vanilla extract? Vanilla bean paste or sugar works in a pinch, though pure extract is ideal. Short on allspice? Double the cinnamon for a similar warm flavor. The butter adds richness, so don't skip it—it's what gives the filling that luscious, restaurant-quality texture. If you're watching calories, you can reduce the butter to 2 tablespoons and add an extra splash of water. The lemon juice is non-negotiable though—it balances the sweetness and keeps the filling from turning mushy. Freshly squeezed is best, but bottled works in a bind.
This filling keeps beautifully in the fridge for up to a week, though it's best used within 3-4 days for peak texture. For longer storage, freeze it in an airtight container for up to 3 months. I like to portion it into 1-cup servings for easy use—just thaw overnight in the fridge before reheating. If you've made extra, it also makes a fantastic topping for pancakes, waffles, or even toast. Just warm it gently on the stove and drizzle it on top.
Why You'll Love This Recipe
- No Peel Required: I swear by this trick—just core and slice those apples, no peeling needed. The skins add subtle earthiness that cuts through the sweetness, and honestly? It saves me 10 minutes every time.
- Spice Magic: That cinnamon-nutmeg combo isn’t just flavor—it’s warmth in a jar. A splash of lemon juice brightens it up, so you get that perfect balance: cozy but not cloying, like autumn in a bowl.
- Pie or No Pie: Use it straight from the pot over vanilla ice cream, stir it into oatmeal, or bake it into a crust. I’ve even used it as a glaze for roasted pork—versatile enough to play hero in multiple meals without breaking a sweat.
- Budget-Friendly Staple: Apples stay cheap in season, and you’re not using fancy ingredients here. Between us, this filling costs me about $3 for a full pie, and the leftovers? They last a week in the fridge or freeze beautifully for lazy mornings.
Step-by-step instructions for apple sauce pie filling
Here's how to create a perfectly balanced apple filling that's thick, fragrant, and full of autumnal warmth.
Peel, Core, and Dice the Apples
Start by peeling the 4 medium apples using a vegetable peeler or sharp paring knife. I like to keep the skin on for color and texture, but peeling ensures a smoother filling. Cut each apple into ¼-inch thick slices first, then cut the slices into ¼-inch dice for even cooking.
Toss the diced apples in a large bowl with the 0.25 cup lemon juice immediately after dicing. This prevents browning and adds bright acidity that balances the sweetness. Let them sit for 5 minutes while you prepare the spices—you'll see the apples turn slightly translucent as they absorb the citrus.
Cook the Apples Until Tender
In a large, heavy-bottomed pot, combine the diced apples with the 1.25 cups granulated sugar, 0.5 cup water, and 0.25 cup unsalted butter (cubed). Bring the mixture to a boil over medium-high heat, stirring occasionally to dissolve the sugar. Once boiling, reduce heat to medium-low and let it simmer uncovered for 15-20 minutes.
You'll know the apples are tender when they break down easily with a fork and the mixture thickens noticeably. Stir occasionally to prevent sticking—this is where that heavy pot comes in handy. If the mixture looks too dry before the apples soften, add 1-2 tablespoons water at a time until it reaches your desired consistency.
Build the Spice Flavor
Once the apples are tender, stir in the 2 teaspoons ground cinnamon, 0.5 teaspoon ground nutmeg, 0.25 teaspoon allspice, and 0.5 teaspoon salt. Let the mixture simmer for another 5 minutes to allow the spices to bloom and infuse fully. The aroma should be rich and warm—this is where the magic happens.
Here's the thing—don't rush this step. The spices need time to meld with the apples and sugar. If you taste it now, you'll notice the spices are bright and distinct. They'll mellow and deepen as the filling cools, creating that perfect balance of sweet, spicy, and tangy flavors.
Finish with Vanilla and Adjust Consistency
Remove the pot from heat and stir in the 1 teaspoon vanilla extract. Let the filling cool for 10 minutes while you prepare your pie crust. This resting time allows the flavors to settle and the filling to thicken naturally.
If the filling is too thick after cooling (it will be), thin it with 1-2 tablespoons water or apple cider until it reaches a spoonable consistency—it should coat the back of a spoon but still hold its shape. For a classic pie filling, you want it thick enough to stay put in the crust but still easy to spoon into your pastry.
Test and Store for Freshness
Taste the filling and adjust the seasoning if needed. You might need a pinch more salt or cinnamon to balance the sweetness. Let the filling cool completely before using it in your pie—this prevents the crust from getting soggy when you bake.
For best results, use the filling immediately in your pie, but it will keep in an airtight container in the refrigerator for up to 5 days. The flavors actually improve overnight, so if you're making the pie ahead of time, this filling will be even better tomorrow. When reheating, warm it gently on the stove or in the microwave until just hot enough to fill your crust.
Pro Tips For Making Apple Sauce Pie Filling
- Peel and Core Fast: Grab a peeler and slice the apples in half horizontally first—this gives you flat surfaces to grip while peeling. I learned this the hard way after dropping half a dozen apples on the floor trying to peel them whole.
- Cook Until Syrupy: Don’t stop at soft—keep the apples simmering until the filling thickens enough to coat the back of a spoon. This isn’t just about texture; it’s what keeps the pie from turning into a soggy mess after baking.
- Measure Spices Fresh: Nutmeg loses potency faster than cinnamon, so smell your spices before adding them. If they don’t smell like a spice rack, toast them in a dry pan for 30 seconds first—it wakes up the flavor without burning.
- Skip the Overmixing: Stir the filling just enough to combine, then let it sit for 5 minutes. Overmixing releases pectin and turns your filling into glue—your pie crust will hate you for it. (Yes, even if you’re impatient like me.)
Dietary considerations for these flavors
Gluten-Free Adaptation
This filling is naturally gluten-free, but if you're using a gluten-free pie crust, make sure it's certified gluten-free to avoid cross-contamination. The recipe itself requires no modifications—just stick to the original ingredients.
I've tested this with Bob's Red Mill 1-to-1 Baking Flour crusts, and the filling pairs beautifully with their buttery texture. 🌾
Low-Sugar Options
For a lower-sugar version, reduce the granulated sugar to 1 cup and add 1 tablespoon lemon juice to enhance natural sweetness. You can also use monk fruit sweetener or erythritol in a 1:1 ratio, though the texture may be slightly lighter.
Taste as you go—sometimes tart apples need less sugar than expected.
Dairy-Free Substitutes
Replace the butter with dairy-free margarine or coconut oil for a vegan version. I recommend Miyoko's Creamery vegan butter for the best flavor. If using coconut oil, use the refined version to avoid coconut taste. The filling will still be rich and creamy, though slightly lighter in color.
Nut-Free Considerations
This recipe is already nut-free, but always double-check your spice blends for cross-contamination warnings. McCormick ground cinnamon and Penzeys allspice are both nut-free, but if you're unsure, opt for single-ingredient spices. The vanilla extract should also be nut-free—look for pure almond-free vanilla brands like Goya.
Allergen-Friendly Tips
For egg allergies, no adjustments are needed since this filling contains no eggs. If you're allergic to citrus, reduce the lemon juice to 2 tablespoons and add 1 teaspoon apple cider vinegar for acidity instead. Always check ingredient labels for hidden allergens, especially in store-bought spices and extracts.
Diabetic-Friendly Adjustments
To make this diabetic-friendly, reduce sugar to ½ cup and add 1 teaspoon cinnamon (cinnamon helps regulate blood sugar). Use unsweetened applesauce (½ cup) to replace some of the water for extra fiber.
The filling will still be flavorful, though slightly less sweet. Pair with a low-carb crust like almond flour-based options.
Nutrition facts
Frequently asked questions
Can I use canned applesauce instead of fresh apples?
Yes, but you'll need to adjust the recipe. Use 2 cups unsweetened applesauce and reduce the water to 2 tablespoons. Add 1 extra tablespoon lemon juice to balance the flavor, and simmer for 10 minutes instead of 20. The texture will be smoother, but you'll lose the natural chunkiness of fresh apples.
How do I prevent my pie crust from getting soggy?
Always let the filling cool completely before pouring it into the crust. Brush the bottom crust with a thin layer of egg wash or applesauce before adding the filling, then sprinkle with powdered sugar or cornstarch to create a barrier. Bake the pie on a preheated baking sheet lined with parchment for 10 minutes before moving it to the oven.
Can I make this filling ahead of time?
This filling actually tastes better after resting. Store it in an airtight container in the refrigerator for up to 5 days or freeze for 3 months. Reheat gently on the stove or microwave until warm. For pies, use the filling cold to prevent a soggy crust. The flavors deepen overnight, making it perfect for meal prep.
What if my filling is too runny?
Simmer the filling uncovered for 5-10 more minutes to reduce the liquid. If it's still too thin, mix 1 tablespoon cornstarch with 2 tablespoons cold water, stir it into the filling, and cook for 2-3 minutes until thickened. For a natural option, mash 1-2 extra apple slices into the filling and simmer for 5 minutes to absorb excess liquid.
Can I use this filling for other desserts?
Yes! This versatile filling works perfectly for tarts, galettes, muffins, or even as a topping for pancakes or ice cream. For galettes, use a thin crust and fold the edges. For muffins, reduce the filling to 1 cup per batch and mix with 1 cup flour and 1 egg. Warm it gently before serving on other desserts.